Red Hat Enterprise Linux Diagnostics and Troubleshooting
- Section Verifying Network Connectivity
- SectionObjectives
- SectionManaging Network Connections with a Text-based User Interface
- SectionManaging Network Connections with the CLI
- SectionSending ICMP Echo Requests
- SectionUnderstanding Name Resolution
- SectionScanning Network Ports
- SectionCommunicating with a Remote Service
- SectionMonitoring network traffic
- Guided Exercise: Verifying Network Connectivity
- Resolving Connectivity Issues
- Guided Exercise: Resolving Connectivity Issues
- Inspecting Network Traffic
- Guided Exercise: Inspecting Network Traffic
- Lab: Troubleshooting Network Issues
- Summary
Abstract
| Goal |
Identify and resolve network connectivity issues. |
| Objectives |
|
| Sections |
|
| Lab |
|
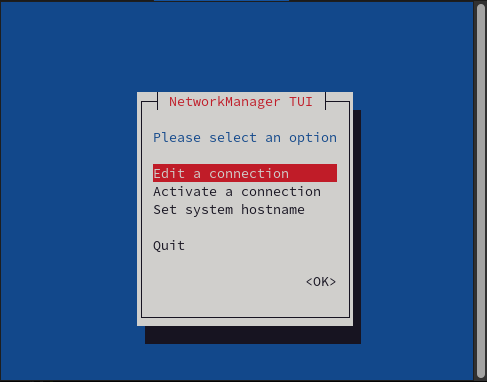
The nmtui application is a text user interface (TUI) for managing NetworkManager. The NetworkManager-tui package provides the nmtui application. To navigate, use the cursor keys or press Tab to advance through the options and press Shift+Tab to return to previous selections. Use Enter to select an option. Use the Space bar to toggle the status of checkboxes.
The nmtui command adds, modifies, activates, and deactivates connection profiles.
Manage NetworkManager configuration with the nmcli command-line tool. The nmcli utility controls the network by creating, displaying, editing, deleting, activating, and deactivating network connections, and managing and displaying network device status. The nmcli utility supports options to modify the output of nmcli commands. Use of the nmcli command simplifies processing the output in scripts. By default, the nmcli utility displays its output in a columnar format.
Display the list of connection profiles:
[root@host ~]#
nmcli connection showNAME UUID TYPE DEVICE Wired connection 2 d2c2b132-f573-3d49-9749-35163328ff0c ethernet eth1 Wired connection 1 924a129f-9360-3151-bf0b-1a15c73a699b ethernet eth0View the information for a particular connection profile:
[root@host ~]#
nmcli connection show "Wired connection 1"connection.id: Wired connection 1 connection.uuid: 924a129f-9360-3151-bf0b-1a15c73a699b connection.stable-id: -- connection.type: 802-3-ethernet connection.interface-name: eth0 ...output omitted...View the list of network devices:
[root@host ~]#
nmcli deviceDEVICE TYPE STATE CONNECTION eth0 ethernet connected Wired connection 1 eth1 ethernet disconnected -- lo loopback unmanaged --
The Internet Control Message Protocol (ICMP) is a low-level protocol to test host availability and to send error messages. A first step to test connectivity is to send ICMP echo requests to the remote host. By default, hosts send an ICMP echo reply to indicate that they are present and running. The ping command implements ICMP to test host network connectivity.
The ping command takes the hostname, or IP address, of the host of interest as an argument. With the -b option, the specified command argument is a broadcast address. By default, ping continuously sends ICMP echo requests once per second. All received responses are displayed with their packet sequence number and latency time. If the user interrupts the command with Ctrl+C, then ping displays a summary.
[user@host ~]$ping serverb.lab.example.com[student@servera ~]$ ping serverb.lab.example.com PING serverb.lab.example.com (172.25.250.11) 56(84) bytes of data. 64 bytes from serverb.lab.example.com (172.25.250.11): icmp_seq=2 ttl=64 time=0.267 msCtrl+C--- serverb.lab.example.com ping statistics --- 2 packets transmitted, 2 received, 0% packet loss, time 1005ms rtt min/avg/max/mdev = 0.267/0.302/0.337/0.035 ms
Multiple options of ping are useful in shell programs. The -c option specifies a count that limits the number of echo requests to send. The COUNT-W option specifies the number of seconds to wait for replies before timing out. The following TIMEOUTping command sends a single echo request and waits three seconds for the response.
[user@host ~]$ping -c 1 -W 3 172.25.250.11...output omitted... [user@host ~]$echo $?0
The ping command returns a zero exit status when the target host responds and a non-zero exit status when no reply is received.
The ping6 command is the IPv6 version of ping. Multiple interfaces can have an IPv6 link-local address (fe80::). The -I option specifies the interface to send the echo requests.INTERFACE
[user@host ~]$ping6 fe80::4ee7:7805:6d16:16b5%eth0...output omitted...Ctrl+C--- fe80::4ee7:7805:6d16:16b5 ping statistics --- 2 packets transmitted, 2 received, 0% packet loss, time 1002ms rtt min/avg/max/mdev = 0.269/0.877/1.485/0.608 ms
The -I option is not needed when ping6 is testing a routable IPv6 address.
[user@host ~]$ping6 serverb.lab.example.com...output omitted...Ctrl+C--- serverb.lab.example.com ping statistics --- 2 packets transmitted, 2 received, 0% packet loss, time 1002ms rtt min/avg/max/mdev = 0.434/0.693/0.953/0.260 ms
The following table lists the most commonly used ping and ping6 options.
| Option | Description |
|---|---|
-b
| Broadcast to the network specified as an argument. |
-n
| Display host information numerically. |
-i
| Specify the echo request interval in seconds (default is 1). |
-I
| Send echo requests through an INTERFACE. |
-c
| Send only COUNT echo requests. |
-W
| Wait TIMEOUT seconds before quitting. |
For security reasons, you can drop or reject ICMP requests, which blocks the request, although clients might still receive information about the blocked request. Blocking ICMP might cause communication problems, especially with IPv6 traffic. The firewall-cmd command can handle different ICMP request types in Red Hat Enterprise Linux 8.
The following example uses the echo-reply request type to explain the management of ICMP requests with the firewall-cmd command.
List all the available ICMP types with the
firewall-cmdcommand:[root@host ~]#
firewall-cmd --get-icmptypes...output omitted...The ICMP request works on IPv4, IPv6, or both protocols. Verify which protocol the ICMP request uses:
[root@host ~]#
firewall-cmd --info-icmptype=echo-replyecho-reply destination: ipv4 ipv6Verify whether an ICMP request is blocked:
[root@host ~]#
firewall-cmd --query-icmp-block=echo-replynoBlock an ICMP request:
[root@host ~]#
firewall-cmd --add-icmp-block=echo-replysuccessVerify whether an ICMP request is blocked:
[root@host ~]#
firewall-cmd --query-icmp-block=echo-replyyesUnblock an ICMP request:
[root@host ~]#
firewall-cmd --remove-icmp-block=echo-replysuccess
If you block ICMP requests, then clients can learn that you are blocking them. A potential attacker searching for live IP addresses can still see that your IP address is online. To hide this information entirely, you must drop all ICMP requests instead.
Block and drop all ICMP requests, and set the target of your zone to
DROP:[root@host ~]#
firewall-cmd --permanent --set-target=DROPsuccessAll traffic is dropped, including ICMP requests, except traffic that you explicitly allow.
To unblock all ICMP requests, set the target of your zone to
default:[root@host ~]#
firewall-cmd --permanent --set-target=defaultsuccess
Applications use the getaddrinfo() function in the glibc library for resolving DNS requests. By default, glibc sends all DNS requests to the first DNS server that is specified in the /etc/resolv.conf file. If this server does not reply, then the resolver uses the next server in this file. NetworkManager dynamically updates the /etc/resolv.conf file with the DNS settings from active NetworkManager connection profiles.
NetworkManager manages DNS servers with the /etc/resolv.conf file, by implementing the following rules:
NetworkManager uses the specified IPv4 and IPv6 DNS servers in the network connection if only one connection profile exists.
The NetworkManager behavior depends on the
dnsvalue when using DNS servers based on DNS priority value. The/etc/NetworkManager/NetworkManager.conffile stores thednsparameter under the[main]section.NetworkManager manages the DNS servers from different connections based on
ipv4.dns-priorityandipv6.DNS-priorityparameters withoutdns=defaultordnsparameters.When using the
dns=dnsmasqordns=systemd-resolvedparameters, NetworkManager sets either127.0.0.1fordnsmasqor127.0.0.53asnameserverentries in the/etc/resolv.conffile.
NetworkManager uses the following default DNS priority values for connections:
50for VPN connections100for other connections
You can set both the global default and connection-specific ipv4.dns-priority and ipv6.dns-priority parameters to a value between -2147483647 and 2147483647.
Nmap is an open source port scanner that is provided in Red Hat Enterprise Linux. The nmap command scans large networks and runs intensive port scans on individual hosts.
Warning
The use of network and port scanning tools can be a cause for immediate employment termination at many organizations. Unauthorized use of scanners can be interpreted as hacking. Always obtain proper permissions, preferably in writing, before using scanning tools on any organization's network.
Nmap uses raw IP packets to determine significant information, such as:
The available hosts on the network.
The service application names and versions that those hosts offer.
The operating systems and versions that the hosts are running.
The type of packet filters or firewalls that the hosts use.
The following example shows nmap scanning the 172.25.250.0/24 network. The -n option displays host information numerically, without using name resolution. As nmap discovers each host, it scans privileged TCP ports to look for services. The host MAC address and the corresponding network adapter manufacturer are displayed.
[root@host ~]# nmap -n 172.25.250.0/24
Starting Nmap 7.70 ( https://nmap.org ) at 2021-10-22 02:36 EDT
Nmap scan report for 172.25.250.9
Host is up (0.00029s latency).
Not shown: 998 filtered ports
PORT     STATE  SERVICE
22/tcp   open   ssh
9090/tcp closed zeus-admin
MAC Address: 52:54:00:00:FA:09 (QEMU virtual NIC)
...output omitted...

Nmap done: 256 IP addresses (4 hosts up) scanned in 216.29 seconds_
The -sn option disables port scans. Use this option to see which hosts are present on a network.
[root@host ~]# nmap -n -sn 172.25.250.0/24
Starting Nmap 7.70 ( https://nmap.org ) at 2021-10-22 02:46 EDT
Nmap scan report for 172.25.250.9
Host is up (0.00080s latency).
...output omitted...
Nmap done: 256 IP addresses (4 hosts up) scanned in 3.75 seconds
The -sU option scans a UDP port. The scanning time is much longer than for the default TCP port scan. Use this option to view detailed information about the services that a host exposes to the network.
[root@host ~]# nmap -n -sU 172.25.250.0/24
Starting Nmap 7.70 ( https://nmap.org ) at 2021-10-22 02:48 EDT
Nmap scan report for 172.25.250.9
Host is up (0.00040s latency).
All 1000 scanned ports on 172.25.250.9 are filtered
MAC Address: 52:54:00:00:FA:09 (QEMU virtual NIC)
...output omitted...
Nmap done: 256 IP addresses (4 hosts up) scanned in 1095.92 secondsThe Ncat troubleshooting tool, from the RHEL nmap-ncat package, communicates directly with a service port. The Ncat tool uses either TCP or UDP to interact with the network service, and supports SSL communication. The -4 and -6 options force Ncat to use either IPv4 or IPv6.
The Ncat tool has two modes of operation.
By default, in connect mode, it acts as a network client. Specify the hostname and port as arguments to the
ncatcommand.[root@host ~]#
ncat mailserver 25220 mail.example.com ESMTP PostfixEHLO host.example.com250-mail.example.com 250-PIPELINING 250-SIZE 10240000 250-VRFY 250-ETRN 250-ENHANCEDSTATUSCODES 250-8BITMIME 250 DSNQUIT221 2.0.0 ByeCtrl+C[root@host ~]#The Ncat tool acts as a server when invoked with the
-loption, which is known as listening mode. With the-koption, the Ncat tool keeps the port open to listen for more connections when used in this mode.[root@host ~]#
ncat -l 2510line of text 1 line of text 2 ...output omitted...
By default in listen mode, the Ncat tool displays on the screen any text that it receives over the network. With the -e option, the Ncat tool passes incoming network traffic to the specified command. The following command launches the Ncat tool in listen mode on port 2510. It passes all network traffic to COMMAND/bin/bash.
[root@remote ~]# ncat -l 2510 -e /bin/bashThe following output shows the Ncat tool communicating with the listener system.
[root@host ~]#ncat remote.example.com 2510lsanaconda-ks.cfgpwd/rootuptime05:30:49 up 4 days, 13:50, 1 user, load average: 0.02, 0.02, 0.05hostnameremote.example.comCtrl+D
Each line of text that is sent to the server executes with /bin/bash. The command output is returned to the network client.
Important
Never directly connect a shell to a network port, for security reasons. The previous example demonstrates only the functionality of Ncat with the -e option.
The IPTraf network monitor software was initially developed in the mid-1990s. RHEL includes the next-generation version of IPTraf, from the iptraf-ng package.
The iptraf-ng command requires superuser privileges. The following screen capture shows the main menu when the tool runs.
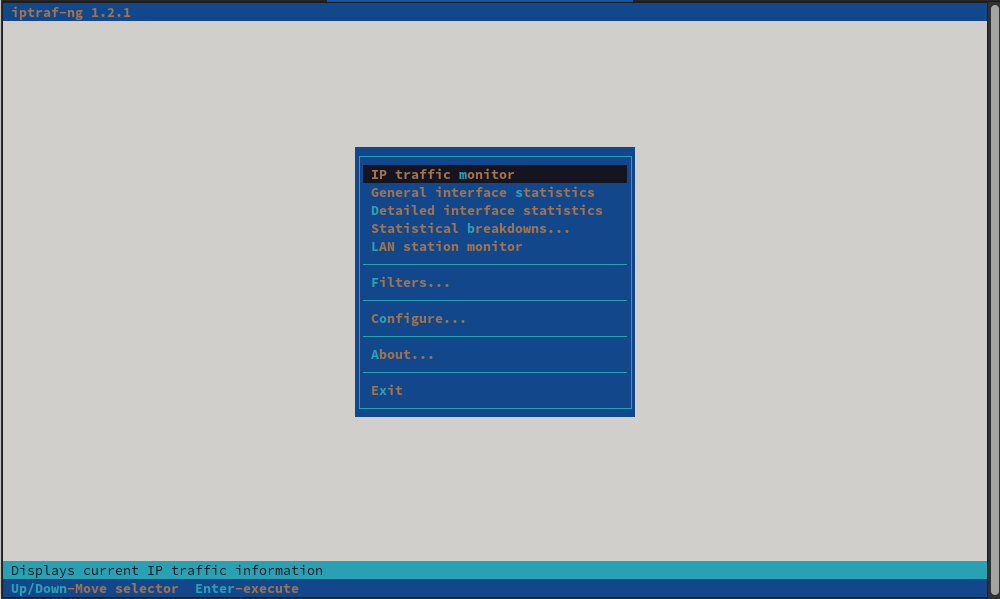
Use the up and down arrow keys to navigate the menu, and then press Enter to select an option. Alternatively, type the highlighted single character to select the option.
The iptraf-ng command monitors current network connections. It also shows UDP and ICMP packet information.
You can use the iptraf-ng command interface to view the network interface statistics.
Use the main menu selection to create filters to include or exclude specific types of network traffic. Each filter is a collection of rules that can select packets based on source, destination, address, port, and IP protocol type.
References
icmp(7), iptraf-ng(8), ncat(1), nmap(1), nmcli(1), nmtui(1) and ping(8) man pages
For further information, refer to Chapter 4. Using nmtui to Manage Network Connections Using a Text-Based Interface at https://access.redhat.com/documentation/en-us/red_hat_enterprise_linux/8/html-single/configuring_and_managing_networking/using-nmtui-to-manage-network-connections-using-a-text-based-interface_configuring-and-managing-networking
For further information, refer to Chapter 5. Getting Started with nmtui at https://access.redhat.com/documentation/en-us/red_hat_enterprise_linux/8/html-single/configuring_and_managing_networking/getting-started-with-nmcli_configuring-and-managing-networking
For further information, refer to Managing ICMP requests at https://access.redhat.com/documentation/en-us/red_hat_enterprise_linux/8/html-single/configuring_and_managing_networking/using-and-configuring-firewalld_configuring-and-managing-networking#managing-icmp-requests_using-and-configuring-firewalld
For further information, refer to How to use iptraf to monitor network interface? at https://access.redhat.com/solutions/30479


