Red Hat Enterprise Linux Diagnostics and Troubleshooting
Configure terminal session recording by using the web console. Configure systems for monitoring, remote logging, and auditing with Ansible Automation Platform as the configuration manager.
Outcomes
You should be able to configure the terminal session recording by using the web console. You should also be able to configure servers as an Ansible Automation Platform control node and managed nodes. Configure the servers as a central and a remote log server with a file access audit system.
As the student user on the workstation machine, use the lab command to prepare your system for this exercise.
[student@workstation ~]$ lab start baseline-review
This command confirms that the required hosts for this exercise are accessible and creates the workdir directory to contain the basic minimum configuration files for the activities to perform.
Instructions
Use the web console to configure terminal session recording for the consultant user. Configure workstation as a control node, and verify communication with servera and serverb as managed nodes. Use Ansible Playbooks to configure the managed nodes:
-
servera Configure terminal session recording for the
consultantuser by using the web console.Configure the
rsyslogservice to serve as a central log host.Create a rule that writes the syslog messages that each host generates to separate files under the
/var/log/loghostdirectory.Use the
rsyslog.conf.j2template file to configure syslog to create subdirectories that are based on the originating host name of each syslog message.The template file configures syslog to create subdirectories, and to maintain a separate log file for each syslog facility.
Add the new log files to the log rotation schedule for size management.
-
serverb Install AIDE to report file and directory changes.
Configure
serverbto send log messages to the central log host.
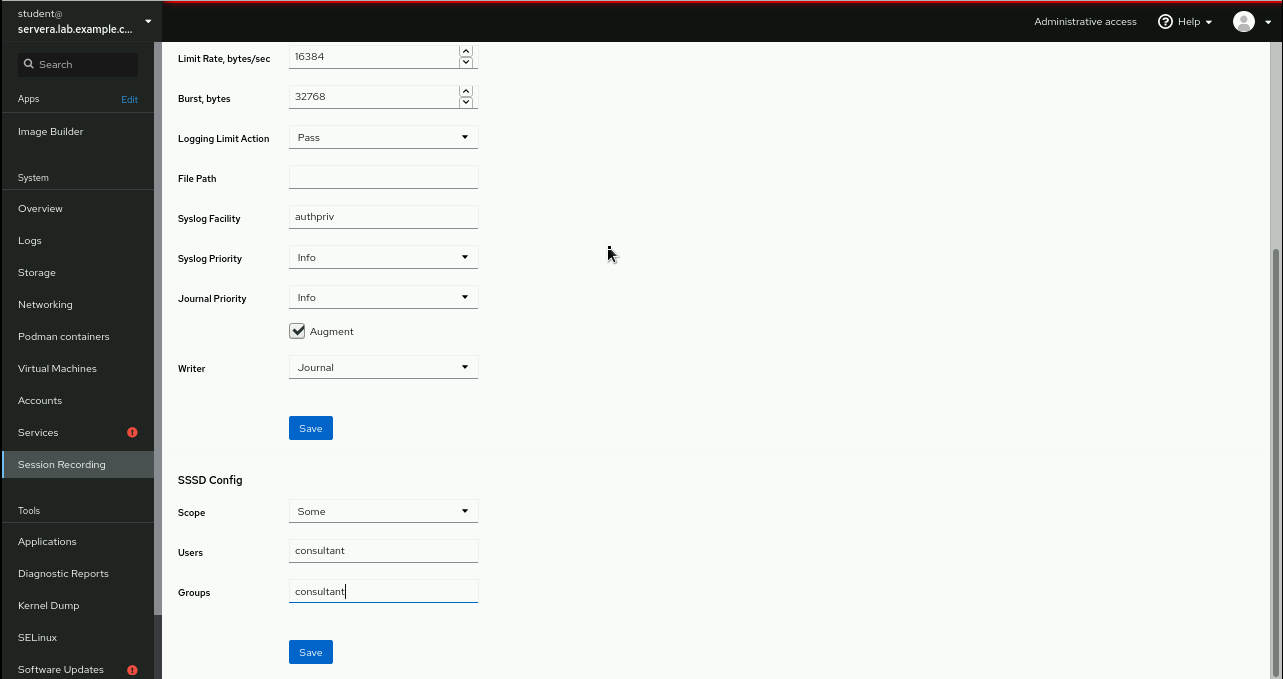
Configure terminal session recording for the
consultantuser.On
workstation, open a web browser and navigate to https://servera:9090. Log in with user namestudentand passwordstudent.
From the left menu, click , and then click the gear icon.
Navigate to and select → . Define
consultantas and .
Click , and then at the top of the page click .
On
workstation, open another terminal and log in toserveraas theconsultantuser.[student@workstation ~]$
ssh consultant@servera[consultant@servera ~]$Run some commands as the
consultantuser, such asps auxf,top, anddf -h.[consultant@servera ~]$
ps auxf...output omitted... [consultant@servera ~]$top...output omitted... [consultant@servera ~]$df -h...output omitted...Return to
workstationasstudent.[consultant@servera ~]$
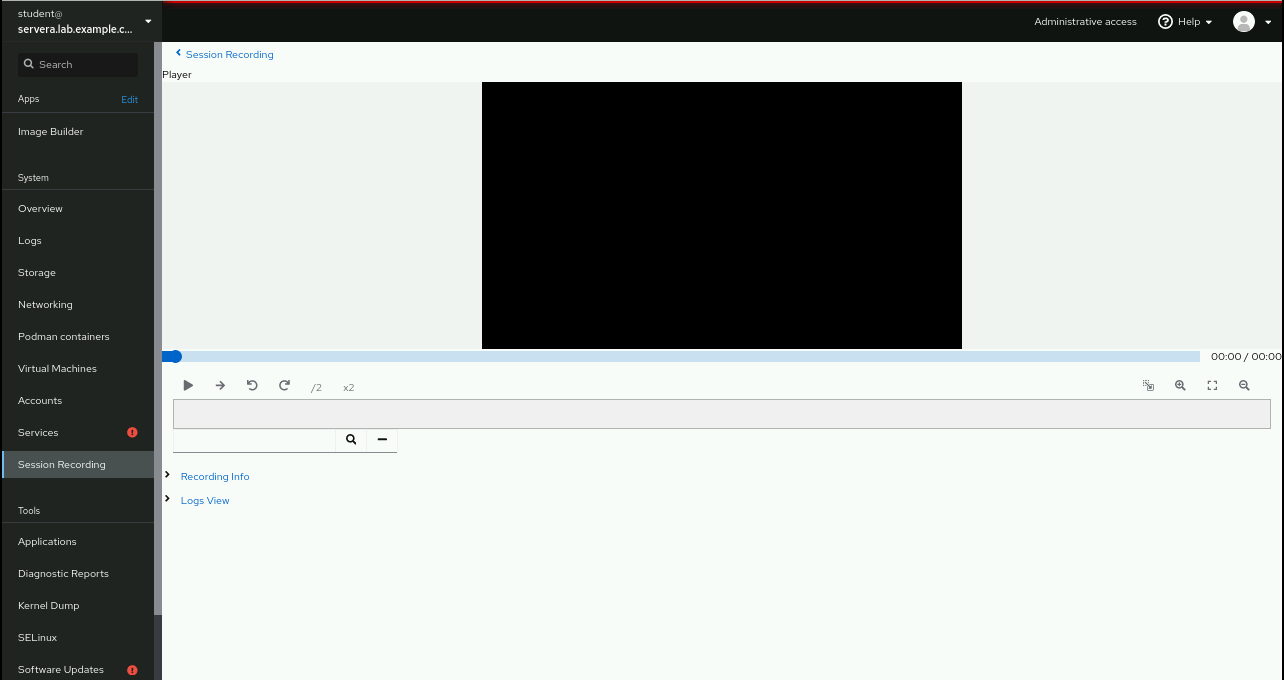
exit[student@workstation ~]$Confirm the terminal session recording. In the web console of
servera, click . Refresh the page if necessary.Click the
consultantuser's recorded terminal session.
Play back the recorded session by clicking .

Configure
workstationas a control node andserveraandserverbas managed nodes. Verify that the control node can reach both.On
workstation, change to theworkdirdirectory and review the configuration files.[student@workstation ~]$
cd workdir[student@workstation workdir]$cat ansible.cfg[defaults] inventory = inventory remote_user = root host_key_checking = False deprecation_warnings = False [student@workstation workdir]$cat inventory[servers] central_loghost ansible_host=serveraAdd
serverbasremote_loghostin theinventoryfile.[servers] central_loghost ansible_host=servera
remote_loghost ansible_host=serverbConfirm that the managed nodes are reached.
[student@workstation workdir]$
ansible all -m pingcentral_loghost | SUCCESS => { "ansible_facts": { "discovered_interpreter_python": "/usr/libexec/platform-python" }, "changed": false, "ping": "pong" } remote_loghost | SUCCESS => { "ansible_facts": { "discovered_interpreter_python": "/usr/libexec/platform-python" }, "changed": false, "ping": "pong" }
Use an Ansible Playbook to configure
serveraas a central log host. Use the provided configuration template.Inside the
workdirdirectory, create themybaseline.yamlAnsible Playbook for thersyslogservice configuration onservera.- name: Configure central loghost hosts: central_loghost gather_facts: False
Confirm that the
rsyslogservice is active and enabled at system startup.- name: Ensure that rsyslog is active and enabled ansible.builtin.service: name: rsyslog state: started enabled: TrueUse the
rsyslog.conf.j2template file as thersyslogservice configuration file to allow remote logging.- name: Template out rsyslog configuration file template: src: rsyslog.conf.j2 dest: /etc/rsyslog.conf owner: root group: root mode: '0444' - name: Restart rsyslog service ansible.builtin.service: name: rsyslog state: restartedEnsure that the
firewalldservice is enabled for thersyslogservice.- name: Open rsyslog firewalld port firewalld: port: 514/tcp immediate: yes permanent: yes state: enabledAdd the remote logs to the configured log rotation.
- name: Add entry for that the new logs have rotation
  lineinfile:
    path: /etc/logrotate.d/syslog
    line: /var/log/loghost/*/*.log
Use an Ansible Playbook to configure
serverbas a remote log server, and configure AIDE to monitor file integrity. Use the provided configuration templates for each service.Add a task to the
mybaseline.yamlplaybook to configureserverbas the remote log server.- name: Configure remote logging hosts: remote_loghost gather_facts: False
Verify that the
rsyslogservice is active and enabled at system startup.- name: Ensure that rsyslog is active and enabled ansible.builtin.service: name: rsyslog state: started enabled: TrueAdd an entry in the
/etc/rsyslog.conffile to redirect logs to the central log host.- name: Add entry for redirecting logs lineinfile: path: /etc/rsyslog.conf line: '*.* action(type="omfwd" target="servera" port="514" protocol="tcp")' - name: Restart rsyslog service ansible.builtin.service: name: rsyslog state: restartedAdd a task to the
mybaseline.yamlplaybook to configure AIDE onserverb.- name: Install AIDE hosts: remote_loghost gather_facts: False
Ensure that the
aidepackage is installed. Use theaide.conf.j2template file as theaideservice configuration file.- name: Ensure that AIDE package is installed ansible.builtin.yum: name: aide state: present - name: Template out AIDE configuration file template: src: aide.conf.j2 dest: /etc/aide.conf owner: root group: root mode: '0444'Initialize the
aidedatabase to start monitoring configured files.- name: Init AIDE database command: aide --init - name: Enable AIDE database command: mv /var/lib/aide/aide.db.new.gz /var/lib/aide/aide.db.gz tags: enable_aidedb
Run the playbook, and then view remote logging and file integrity on
serverb.Verify that the final Ansible Playbook
mybaseline.yamlcontains this content:- name: Configure central loghost hosts: central_loghost gather_facts: False tasks: - name: Ensure that rsyslog is active and enabled ansible.builtin.service: name: rsyslog state: started enabled: True - name: Template out rsyslog configuration file template: src: rsyslog.conf.j2 dest: /etc/rsyslog.conf owner: root group: root mode: '0444' - name: Restart rsyslog service ansible.builtin.service: name: rsyslog state: restarted - name: Open rsyslog firewalld port firewalld: port: 514/tcp immediate: yes permanent: yes state: enabled - name: Add entry for that the new logs have rotation lineinfile: path: /etc/logrotate.d/syslog line: /var/log/loghost/*/*.log - name: Configure remote logging hosts: remote_loghost gather_facts: False tasks: - name: Ensure that rsyslog is active and enabled ansible.builtin.service: name: rsyslog state: started enabled: True - name: Add entry for redirecting logs lineinfile: path: /etc/rsyslog.conf line: '*.* action(type="omfwd" target="servera" port="514" protocol="tcp")' - name: Restart rsyslog service ansible.builtin.service: name: rsyslog state: restarted - name: Install AIDE hosts: remote_loghost gather_facts: False tasks: - name: Ensure that AIDE package is installed ansible.builtin.yum: name: aide state: present - name: Template out AIDE configuration file template: src: aide.conf.j2 dest: /etc/aide.conf owner: root group: root mode: '0444' - name: Init AIDE database command: aide --init - name: Enable AIDE database command: mv /var/lib/aide/aide.db.new.gz /var/lib/aide/aide.db.gz tags: enable_aidedbRun the playbook and verify that it finishes successfully.
[student@workstation workdir]$
ansible-playbook mybaseline.yamlPLAY [Configure central loghost] ********************************************* TASK [Ensure that rsyslog is active and enabled] ***************************** ok: [central_loghost] TASK [Template out rsyslog configuration file] ******************************* changed: [central_loghost] TASK [Restart rsyslog service] *********************************************** changed: [central_loghost] TASK [Open rsyslog firewalld port] ******************************************* ok: [central_loghost] TASK [Add entry for that the new logs have rotation] ************************* ok: [central_loghost] PLAY [Configure remote logging] ********************************************** TASK [Ensure that rsyslog is active and enabled] ***************************** ok: [remote_loghost] TASK [Add entry for redirecting logs] **************************************** changed: [remote_loghost] TASK [Restart rsyslog service] *********************************************** changed: [remote_loghost] PLAY [Install AIDE] ********************************************************** TASK [Ensure that AIDE package is installed] ********************************* changed: [remote_loghost] TASK [Template out AIDE configuration file] ********************************** changed: [remote_loghost] TASK [Init AIDE database] **************************************************** changed: [remote_loghost] TASK [Enable AIDE database] ************************************************** changed: [remote_loghost] PLAY RECAP **************************************************************** central_loghost :ok=5changed=2unreachable=0 failed=0 remote_loghost :ok=7changed=6unreachable=0 failed=0Note
Output may vary depending on changes or re-run of the Ansible Playbook.
On
workstation, open another terminal and log in toserverbas theconsultantuser.[student@workstation workdir]$
ssh consultant@serverb[consultant@serverb ~]$Generate some syslog messages with different log facilities and priorities. Then, return to
workstationasstudent.[consultant@serverb ~]$
logger -p user.info "Test user.info message from serverb"[consultant@serverb ~]$logger -p cron.crit "Test cron.crit message from serverb"[consultant@serverb ~]$exit[student@workstation workdir]$Log in to
serveraand usesudoto verify the remote logging. Usestudentas password when prompted.[student@workstation workdir]$
ssh student@servera[student@servera ~]$sudo grep consultant /var/log/loghost/serverb/user.log[sudo] password for student:studentSep 22 00:09:37 serverb consultant[39113]: Test user.info message from serverb [student@servera ~]$sudo grep consultant /var/log/loghost/serverb/cron.logSep 22 00:09:56 serverb consultant[39202]: Test cron.crit message from serverbReturn to
workstationasstudent.[student@servera ~]$
exit[student@workstation workdir]$sshtoserverb. Use sudo to verify the integrity of the monitored files. Enterstudentas password.[student@workstation workdir]$
ssh student@serverb[student@serverb ~]$sudo aide --check[sudo] password for student:studentStart timestamp: 2021-09-22 00:15:27 -0400 (AIDE 0.16) AIDE found NO differences between database and filesystem. Looks okay!! Number of entries: 5 --------------------------------------------------- The attributes of the (uncompressed) database(s): --------------------------------------------------- /var/lib/aide/aide.db.gz MD5 : Q6Ba4uEAWnVokSR5IoGcGA== SHA1 : gtNsnq9mM5ljKC0tsjdyJRVIobw= RMD160 : DhFPdM+jfYw7uHqnNRmwbEwQbxY= TIGER : IvUi93X18F+O/nkkHBhgrpc0/EobIvVc SHA256 : 0a6zINluSdksWHL4jFLkqT7XI6waQgrS xt+TmWcl61w= SHA512 : 65bpzDil3IYXMOjzb4zepETkfW9r9O6k hmiBKGXoE3aPjS2F8eOc/smbUiU9sc9/ NFyNOKhXZtNC65WN6fDxdQ== End timestamp: 2021-09-22 00:15:27 -0400 (run time: 0m 0s)Return to
workstationas thestudentuser and change to its home directory.[student@serverb ~]$
exit[student@workstation workdir]$cd ~[student@workstation ~]$